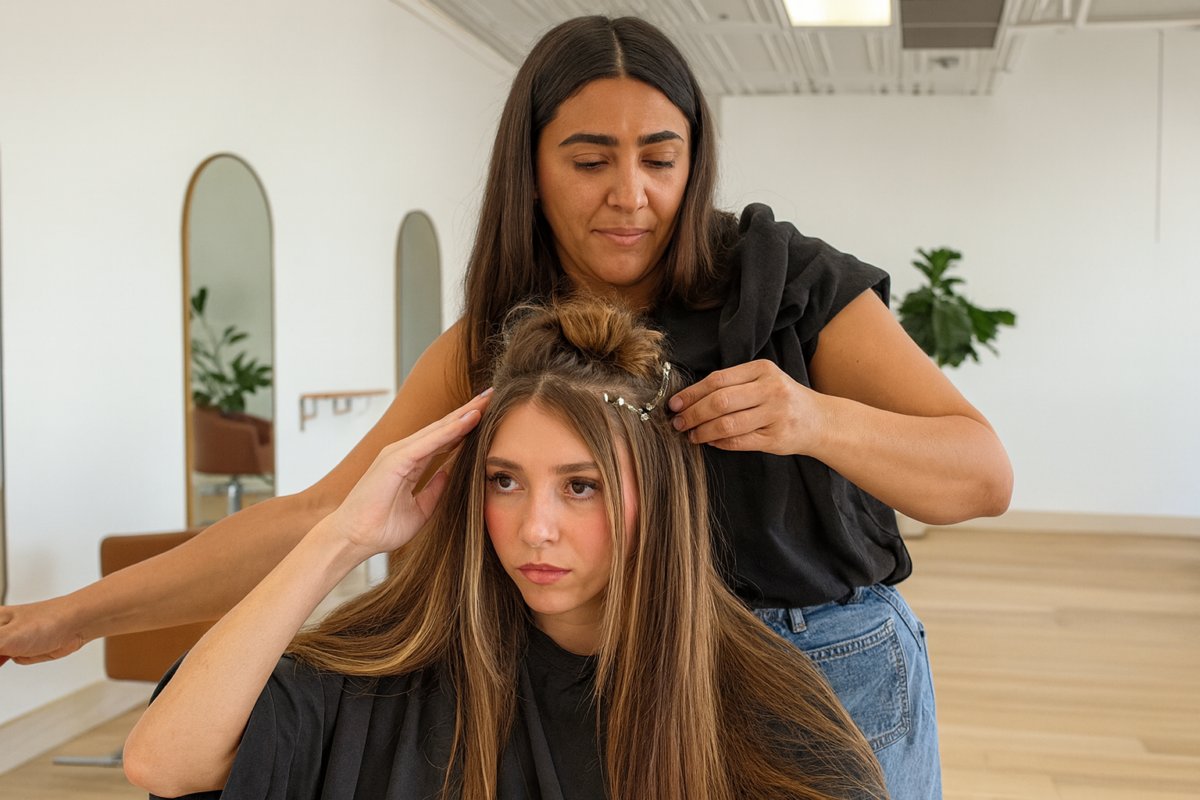
If we’re honest, clients fall in love with the hair they see in the mirror, but the real magic happens in the part they never see, the row. We feel it the second we run our fingers along the base and notice whether that beaded foundation is smooth, balanced, and tension-free. The beaded foundation is created by carefully beading a section of the client’s natural hair, which is essential for protecting and blending the client’s natural hair with the extensions to achieve a seamless, natural look. When the row is right, the hair moves as it grows there, and when it’s wrong, everything from comfort to invisibility starts to fight us.
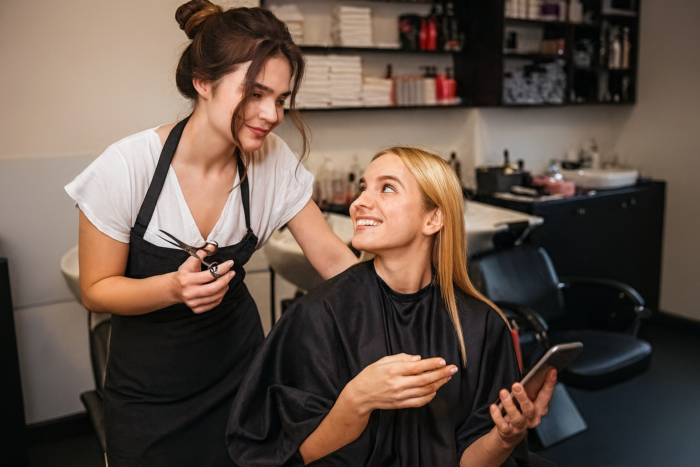
Most of us came into the beauty industry obsessed with color, cutting, and styling. Then we discovered hand-tied extensions and realized how much power a single row can have over a client’s confidence. With Invisible Bead Extensions®, or invisible bead extensions, as many clients call them, the real difference comes down to learning to start a row, choosing the right stitching pattern, and tying off in a way that feels as good as it looks.
Those three skills separate a basic hair extension installation from a luxury service that clients rave about. They’re also what protect the client’s natural hair and scalp, so everything stays beautifully intact through the grow-out phase. In this article, we’ll walk through these techniques together and talk about how IBE extensions and the IBE method can become the best method in your chair when you have the right training behind you.
Why Rows Matter in Invisible Bead Extensions®
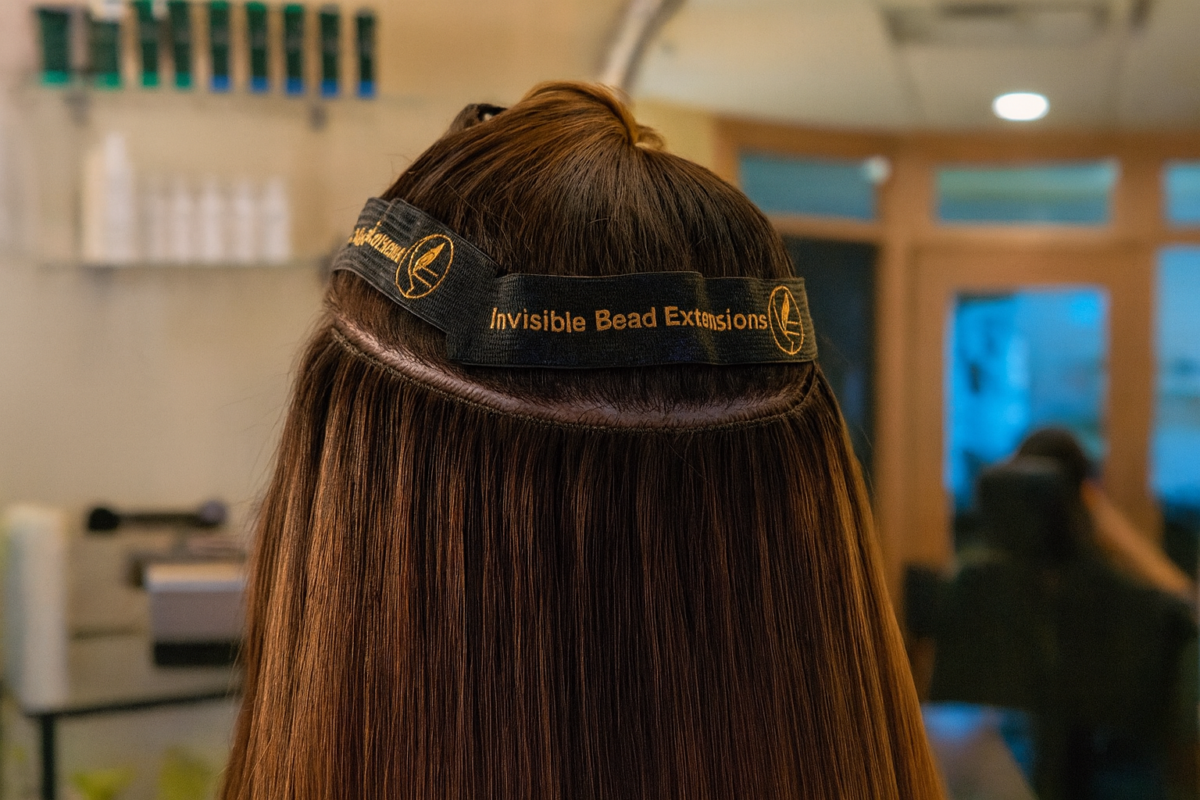
In the Invisible Bead Extensions® extension method, everything rests on a row of silicone-lined beads with hand-tied wefts sewn onto them.
That row isn’t just “the base”; it’s a custom beaded foundation that responds to head shape, hair density, and the way your client actually lives in their hair.
When we respect the row, we protect both the extensions and the client’s natural hair at the same time.
Every IBE® row is mapped and placed with intention.
We’re not just learning to install a row; we’re learning to create beaded rows that follow the head shape, hide the attachment points, and support a seamless blend.
That includes how to start a row IBE style, how to plan placement lines, and how to keep tension and weight even along the scalp.
IBE extensions were developed as a gentle method to avoid the damage, discomfort, and visibility some clients experience with other popular extension methods.
Compared to tape-ins, braid-based tracks, and other methods, IBE® focuses on scalp comfort, hair health, and invisible attachment points that still feel secure.
When we master rows, we can confidently say we’re offering one of the best options among popular extension methods for long-term wear.
Understanding the IBE® Row Foundation
Before we get into the finer details, we need to be clear on what a “row” actually is.
In this method, a row is a combination of a beaded foundation plus one or more hand-tied wefts that are stitched to those beads in a strategic pattern.
You can think of it as a flexible bridge that connects the client’s natural hair to the added hair without overwhelming any one area.
The type of beads we use and how we place them matters.
The small silicone-lined beads cushion the hair inside and allow us to control tension along the entire row.
This is especially important for clients with fine hair, because we want to support the length and fullness they want without sacrificing hair health.
Row design is never one-size-fits-all.
We consider head shape, density, parting, styling habits, and whether we’re planning one row, two rows, or even more for maximum volume.
Done well, the beaded foundation keeps the extensions beautifully intact and sets us up for a seamless finish that looks natural from root to ends.
One Row vs. Multiple Rows: Deciding What’s Best for Each Client
When it comes to invisible bead extensions, one of the most important decisions a stylist and client will make together is whether to install one row or opt for multiple rows. This choice isn’t just about adding more hair, it’s about customizing the extension method to fit the client’s natural hair, lifestyle, and desired outcome.
For clients with fine hair or those seeking a subtle boost in volume and length, a single row of hand-tied extensions can be the perfect solution. One row, anchored with a carefully crafted beaded foundation, offers a seamless blend with the client’s natural hair. This approach delivers natural-looking fullness without overwhelming delicate strands, making it a gentle method that prioritizes hair health. It’s ideal for those who want to enhance their look while keeping maintenance simple and styling options flexible.
On the other hand, clients craving a more dramatic transformation, think extra volume, added length, or a fuller, more luxurious finish, may benefit from multiple rows of invisible bead extensions. By layering two or more rows, stylists can create a multidimensional effect that’s both glamorous and versatile. This method is especially popular for clients with thicker natural hair or those who love experimenting with different styles. However, each row must be installed with precision, using proper spacing and tension to protect the client’s natural hair and ensure long-term comfort.
The decision between one row and multiple rows also comes down to lifestyle and daily maintenance. Clients who prefer low-maintenance routines may find that one row is easier to care for, requiring less time for detangling and styling. Those with multiple rows should be prepared for a bit more daily attention, including gentle detangling with a paddle brush or round brush, and following aftercare advice to keep both the extensions and natural hair beautifully intact.
Regardless of the number of rows, proper care is key. We always recommend washing with a sulfate-free shampoo and using a hydrating conditioner, focusing on mid-lengths and ends. After washing, softly squeeze out excess water, never rub, and allow the hair to air dry when possible. If heat styling is part of your routine, keep hot tools away from the beaded foundation and attachment points to maintain the integrity of both the extensions and your natural hair. Avoid protein treatments unless specifically advised by your stylist, as too much protein can make both the extensions and natural hair feel brittle.
Ultimately, the best method is the one that fits the client’s unique needs and goals. During the consultation, experienced stylists will assess hair density, scalp health, desired length, and styling habits to recommend the right number of rows. By customizing the installation and providing clear aftercare advice, stylists can deliver a luxury service that not only looks stunning but also supports long-term hair health and client satisfaction.
Whether you choose one row for a subtle enhancement or multiple rows for maximum impact, invisible bead extensions offer a seamless blend and a natural, comfortable feel. With the right method, quality installation, and proper maintenance, clients can enjoy beautiful, healthy hair that elevates their confidence and style for months to come.
Learning to Start a Row
Starting a row might look simple on a quick video, but any experienced stylists know it’s where everything gets decided.
The way we section, place the first beads, and build the beaded foundation sets the direction, tension, and comfort level for the entire installation.
Learning to start a row with intention is what separates guesswork from confident, repeatable results.
Sectioning, Mapping, and Placement Lines
We always begin with clean, deliberate sectioning.
Placement lines are mapped to protect the scalp, follow the natural curve of the head, and support hidden, secure attachment points.
This is where we align what the client wants, like wearing high ponytails or top buns, with what their hair and scalp can comfortably support.
A good section is even, consistent, and tailored to the client’s density and natural patterns.
We want enough hair in the section to support the beaded rows without overloading the same strands in every installation.
This protects the client’s natural hair and gives us a stable base for both the extensions and styling that will follow.
Thoughtful placement lines also set up how the hair will move.
When we map the row correctly, the extensions can flip, wave, and bend without exposing beads or tracks.
That’s how we create a seamless blend that still feels flexible and easy for the client to live in.
Building the Beaded Foundation
Once the placement line is set, we move into building the beaded foundation itself.
The very first bead is the sign of what’s coming, it sets the angle, tension, and direction for the whole row that follows.
If it’s off, the entire line can drift and create subtle discomfort that shows up later.
We keep bead spacing consistent and follow the actual head shape rather than forcing a straight line onto a round surface.
This helps us protect the scalp from hot spots and makes the installation feel like it belongs there, not like it’s pulling or pinching.
The goal is a secure yet gentle method that supports a tension-free experience from initial installation through maintenance visits.
In the IBE method, beads sit close to but not smashed against the scalp.
That placement lets the row sit flat while still allowing room for natural movement as the hair grows and the client goes about daily life.
It’s this balance that helps extensions IBE installs look natural, feel comfortable, and support long-term hair health.
Learning Environments for Starting a Row
These skills are so much easier to pick up when we’re learning inside the right hair extension training structure.
The IBE® Certification Program functions like a certified hair extension course, guiding stylists through mapping, beadwork, and safe installation step by step.
For many, it becomes their first real hand-tied extension certification experience where standards and details truly matter.
From there, stylists often layer in deeper education through hair extension training classes and online learning.
IBE’s Masters-level education is similar to some of the best hair extension training courses and hair extension certificate programs on the market, but built around the specific needs of IBE extensions.
You’ll see concepts broken down in a way that feels like the best hair extension courses you’ve ever taken, with video education, tool lists, and real case studies.
If you prefer being hands-on, in-person IBE Technique Intensives can complement online hair extension courses and formal hair extension certification.
Think of them as advanced hair extension training where you install full rows, get live feedback, and refine your details in real time.
Many stylists treat this combined path, certification, online hair extension courses, and in-person technique days, as the best hair extension training courses they’ve ever invested in.
Stitching Patterns for IBE® Rows
Once the beaded foundation is in, the stitching pattern brings everything together.
Stitching patterns for hand-tied extensions aren’t just “sewing wefts on”; they are intentional thread paths that control how weight, movement, and comfort show up in the final result.
With this method, a smart stitching pattern is what makes a row look seamless and feel soft.
What a Stitching Pattern Actually Does
A good stitching pattern distributes the weight of the hand-tied wefts evenly across the row of beads.
Rather than letting both the extensions and the client’s natural hair hang from just a few tight points, the thread connects everything into a balanced system.
This balanced support helps protect the hair inside each bead and keeps the installation feeling stable.
The stitching pattern also keeps the wefts flat and snug to the head.
When we stitch around and between beads correctly, we reduce bulk and avoid wefts lifting away from the scalp.
That’s how we create a seamless finish where clients can part, flip, and style without worrying about visible attachment points.
Finally, a smart pattern protects the scalp by preventing tension from concentrating in one spot.
If a section is too tight, clients may feel pulling, itching, or soreness during heat styling or even regular wear.
When the pattern is right, the row feels like it’s moving with the scalp instead of fighting against it.
Elements of a Good Stitching Pattern
There are a few elements we watch every time we stitch.
First, we keep stitch spacing consistent so weight is spread evenly and wefts stay supported along the entire row.
Random gaps can lead to loose areas, while bunched-up stitches can create unnecessary tension.
Second, we pay attention to how the thread travels around the beads and through the wefts.
We want a pattern that ties the beaded foundation and weaves into one cohesive structure without overloading a single bead.
The method is detailed, but once it clicks, it becomes second nature.
Third, we constantly check tension.
We aim for stitches that are tight enough to hold but loose enough to flex with natural movement and scalp elasticity.
This kind of thoughtful stitching is what allows clients to wear their extensions through the full grow-out phase while staying comfortable.
Learning to Refine Stitching
Refining stitching often happens after the basics are in place.
Stylists use online learning, detailed video breakdowns, and advanced hair extension courses inside IBE® education to focus on the finer points of tension and consistency.
This type of targeted hair extension training helps deepen your knowledge without slowing down your pace behind the chair.
In-person IBE programs feel like the best hair extension training courses many stylists have ever taken.
You install a full row while educators watch your hands, tension, and stitch path, and then help you adjust in real time.
That kind of hair extension training class experience brings the small details into focus in a way no single video can.
Over time, you’ll notice your quality improving even when you’re busy in the salon.
Your wefts will sit flatter, your rows will wear more predictably, and your clients will describe their hair as more comfortable and natural.
That’s when you know your hand-tied extension certification and daily practice are really paying off.
How to Tie Off a Row Securely and Comfortably
Tying off a row might seem like just the final step, but it has a big impact on how the row feels and wears.
A rushed or heavy-handed tie-off can undo a lot of careful work in the foundation and stitching.
We treat tying off as a key part of the method, not an afterthought.
What “Tying Off a Row” Means
When we talk about tying off a row in this context, we mean finishing the stitching in a way that locks everything in place without creating bulk.
The tie-off keeps the pattern from loosening, even as the client washes, styles, and wears the extensions daily.
It’s the last chance we have to protect both the extensions and the client’s natural hair.
A secure tie-off helps the row stay flat and balanced.
It allows the row to move naturally with the scalp during blow drying, air drying, and everything in between.
Done well, the client doesn’t feel where the row ends; they just feel that everything is secure and soft.
Tying off also influences how predictable the grow-out phase will be.
A thoughtful, clean tie-off means the row stays neat and holds its shape as it moves away from the scalp.
This is a big part of delivering a luxury service that looks polished, not just on day one, but weeks later.
Indicators of a Good Tie-Off
There are clear ways to tell if a row has been tied off correctly.
First, the row lies flat, with no puckering, bumps, or lifting where the stitching ends.
It should look like one continuous, smooth line along the head.
Second, you don’t feel bulky knots or sharp pressure points.
If a client points to one spot and says something hurts or itches there, the tie-off area is worth checking.
A good tie-off disappears into the row rather than calling attention to itself.
Third, the attachments stay hidden in motion.
Whether your client wears top buns, waves, or straight styles, the wefts and beads stay covered.
That’s how we maintain a seamless blend and a seamless finish that looks natural from every angle.
What Can Go Wrong with Poor Tie-Offs
When tie-offs are rushed or inconsistent, clients feel it.
They may notice tightness, soreness, or headaches after installation, especially when they touch or style near the row.
That’s often a sign that tension or bulk is concentrated right at the end of the stitching.
Wefts may also start to loosen before the next maintenance visit.
Even if the beaded foundation and stitching were solid, a weak tie-off can cause slippage and extra visits for fixes.
That impacts your schedule, your earning potential, and the client’s confidence.
Visually, a poor tie-off can expose thread or beads when the hair moves.
You might have done beautiful styling and color work, but visible attachments will draw the eye more than anything else.
This is why we give tie-offs as much respect as starting a row and designing the stitching pattern.
How Technique Affects Safety, Comfort, and Grow-Out
Starting a row, stitching, and tying off may be three separate steps, but clients experience them as one thing: how their extensions feel and look every day.
If any part is off, whether it’s placement, tension, or finishing, the client will notice in comfort, styling, or maintenance.
When all three are dialed in, the row looks invisible, feels light, and wears beautifully.
Proper technique helps protect the scalp and the client’s natural hair.
By controlling tension, supporting hair health, and respecting elasticity, we use this method to protect the hair inside each bead.
That’s a key reason many certified stylists choose IBE® as their best method for long-term wear.
Good technique also leads to predictable maintenance and smoother appointments.
When we build the row well from initial installation through the grow-out phase, move-ups become more about maintenance than repair.
We can deliver better services in less time, with fewer surprises for our clients or us.
Aftercare, Daily Maintenance, and Client Education
Even the best installation depends on proper care at home.
We coach clients on daily maintenance so their hair and extensions stay soft, smooth, and beautifully intact between visits.
This is where our aftercare advice and product guidance really matter.
We recommend washing with a gentle, sulfate-free shampoo and following with a hydrating conditioner focused on mid-lengths and ends.
Clients can use a light hair oil on the ends of both the extensions and their natural hair to keep everything hydrated without weighing it down.
We also remind them to avoid protein treatments or heavy protein treatments unless specifically recommended, because too much protein can make the hair feel stiff or brittle.
When hair is wet, we tell clients to softly squeeze out excess water with a towel instead of rough rubbing.
They can start detangling from the ends with a paddle brush or a soft brush designed for extensions, working up toward the row.
Whether they air dry or use a round brush for blow drying, we want tension to be gentle around the beaded foundation and wefts.
Heat styling is absolutely fine with proper care, as long as clients keep hot tools away from the beads and attachment points.
We encourage them to avoid sleeping with very tight top buns or heavy, wet styles that pull on damp hair near the row.
Clear, simple aftercare advice like this helps protect your work, extends the life of the installation, and keeps the hair looking like a luxury service long after they leave the salon.
Where to Learn and Level Up These Skills
The good news is, you don’t have to figure this all out by guessing.
There are structured hair extension courses and hair extension training paths built around this exact method.
If you want to become one of the experienced stylists known for flawless, scalp-friendly installs, the education path matters as much as the tools in your kit.
Inside the IBE® ecosystem, you’ll find education that feels like some of the best hair extension courses on the market.
You can pair a certified hair extension course style of certification with ongoing online hair extension courses that deepen your knowledge over time.
Think of it as a full stack of hair extension training: formal hair extension certificate programs, ongoing online learning, and in-person refinement.
Here’s how many stylists structure their growth:
- Start with a core hair extension certification similar to a hand-tied extension certification so you understand standards, safety, and method structure.
- Add in advanced IBE® Masters education that feels like the best hair extension training courses focused on placement, beadwork, stitching patterns, and scalp health.
- Layer on in-person education that functions like high-level hair extension training classes, where your work is reviewed in real time, and you can ask detailed questions.
Whether you’re looking for the best hair extension training courses, a certified hair extension course to formalize your skills, or online hair extension courses you can fit around a full book of services, there’s an education path that fits.
The more knowledge you stack, the more confidently you can deliver consistent, high-quality installation and maintenance for your clients.
And that’s exactly what builds trust, referrals, and long-term growth for you and your salon.
FAQs: Learning to Start a Row, Stitching Patterns, and Tying Off
What does “starting a row” mean in the Invisible Bead Extensions® method?
Starting a row in this method means creating the first beaded foundation on the client’s head.
We section, map placement lines, and apply beads along that line to support the wefts.
How we start determines direction, tension, and how comfortably the rest of the installation will sit on the scalp.
Why is bead placement so important when starting a row?
Bead placement controls both security and comfort.
If beads are too close, too far apart, or not following the head shape, we can create tension points or weak sections in the row.
Thoughtful beadwork helps protect the client’s natural hair and keeps the extensions stable, invisible, and comfortable.
What is a stitching pattern in an IBE® row, and why does it matter?
A stitching pattern is the way we move the thread through the wefts and beads along the row.
It decides how evenly the weight is distributed, how flat the wefts sit, and how secure the row feels through daily styling and wash days.
A strong pattern supports safety, comfort, and invisibility from installation through the whole grow-out phase.
How does the IBE® method keep rows secure but still comfortable on the scalp?
The method uses carefully mapped placement lines, balanced bead spacing, and thoughtful stitching patterns that respect scalp elasticity.
Rows are built to be secure enough to hold, but not so tight that they pull on the hair or scalp.
The result is a gentle method that feels stable and natural, even for long wear.
How can I tell if my row has been tied off correctly?
A well-tied row lies flat, with no visible lifting, puckering, or bulky knots at the end of the stitching.
You shouldn’t feel sharp pressure points when you touch along the row, and the attachments should stay hidden in everyday styling.
If the client feels comfortable and everything stays in place between maintenance appointments, that’s a good sign the tie-off was done well.
What are common signs that a row was started, stitched, or tied off incorrectly?
Clients might notice tightness, soreness, or headaches if tension is too high or the row was started placement.
You may see visible thread, exposed beads, or uneven lifting of the wefts if stitching patterns or tie-offs weren’t executed correctly.
Frequent slippage, constant adjustments, or rows that don’t make it to the next maintenance visit are also signs that something needs to be revisited.
Can I learn row starting, stitching patterns, and tie-offs through IBE® online courses?
Yes, many stylists build these skills through IBE® education that includes online learning as well as in-person support.
You can combine a core hair extension certification with ongoing online hair extension courses focused on rows, stitching patterns, and tie-offs. For even more precision, in-person trainings and advanced technique days give you the chance to refine your details with live feedback.
Conclusion: Row Skills That Change Everything
When we zoom out, learning to start a row, refining stitching patterns, and tying off with intention are not just technical details, they’re the foundation of every safe, comfortable, and beautiful IBE® install we deliver.
These skills protect the client’s natural hair, keep the scalp happy, and make the extensions feel like a natural extension of who they are, not something they have to “put up with.”
When those three pieces are solid, everything else, color, length, styling, and maintenance, gets easier.
As we build our skills through structured hair extension training, online learning, and hands-on classes, we’re not just adding another service to our menu.
We’re positioning ourselves as experienced stylists who understand the details that clients can’t see but absolutely feel.
That’s what turns a basic hair extension service into a true luxury service that clients rebook for, talk about, and refer their friends to.
If you’re feeling called to level up, consider your next step, whether that’s an online hair extension course, a certified hair extension course style program, or an in-person IBE-focused intensive.
The more confidently you can start a row, stitch it, and tie it off, the more predictable your results will be and the more trust you’ll build with every person in your chair.
In the end, great rows don’t just change hair; they change your business, your earning potential, and the way your clients feel every time they look in the mirror.